RobertRoche Posted February 7, 2015 Share Posted February 7, 2015 Hello everyone, this is my workbench thread. In the future I hope to be building a layout set in the period of approximately 2000-present. I'm a big fan of GMs and IE orange trains. Other upcoming projects include modifying RTR stock to my liking, a 009 Bord na Mona layout (possibly) and some other random bits. Here is some of the motive power I currently have. 1 Quote Link to comment Share on other sites More sharing options...
burnthebox Posted February 7, 2015 Share Posted February 7, 2015 Well done robbie58, I do like your thinking of "modifying RTR stock to my liking ", my kind of thinking also, do keep the pics coming & maybe a video of your layout plans Quote Link to comment Share on other sites More sharing options...
RobertRoche Posted February 7, 2015 Author Share Posted February 7, 2015 I got a Lima Class 33 about 15 years ago, painted in IR orange. It was never a great runner and it is not prototypical. In October I decided to take the plunge and start my modifying and scratch building career with turning the 33 into a C class. The first thing I did was to replace the Lima pancake motor with a Susomotor. It now runs better, but the chassis is not the best. There is a long list of things I did to the 33 to get it as far as it is currently: Remove moulded on detail, including grab rails, rood mouldings etc. Fill in front three windows and make two instead Fill driver side window and windows along body of class 33 Removed approximtely 1.5 cm from body and chassis (it is still over scale length) Drop buffer beam (not yet completed) Remove roof fan and replace with brass etched fan Include some Studio Scale Models brass etched details There is still lots to do. I am currently working on the radiator grills, but am a bit stuck as to how to pull it off. The plastic is quite thick so the brass grills will probably have to go on the outside. I am also unsure as to whether I should remove the plastic behind the grills? The picture below shows the shortened class 33 I am happy with the roof fan. I used a bit of scrap brass from a kit to make the cowling. It was awkward to bend but it makes a nice effect I think The SSM window frames really make it easy to shape the front windows. I used some plastic safe superglue to fix them to the milliput. I used a file to remove milliput after installing the frames rather than before so I would not remove too much. The main tasks left are installing the radiator grills, rigging up the lights (SSM), doing something with the roof line at the front and installing the headlight, and painting, which is a long way off. I will also need to scratch build some detailing under the chassis and add as much weight as possible. 2 Quote Link to comment Share on other sites More sharing options...
Noel Posted February 8, 2015 Share Posted February 8, 2015 Well done for having a go at such a difficult conversion. Looks promising. Look forward to end result. The new cab windows look good. Quote Link to comment Share on other sites More sharing options...
Weshty Posted February 8, 2015 Share Posted February 8, 2015 Nice work Robbie, plenty of hours in there I'd say. Quote Link to comment Share on other sites More sharing options...
burnthebox Posted February 8, 2015 Share Posted February 8, 2015 Robbie, very well done, great bit of work you have done so far, looking forward to further pics & info on your plans for this class 33, keep the pics coming Quote Link to comment Share on other sites More sharing options...
Hunslet 102 Posted February 8, 2015 Share Posted February 8, 2015 Fair play trying to turn a class 33 into a C class,with a good start having already been made.Look forward to your progress with this project. Quote Link to comment Share on other sites More sharing options...
islandbridgejct Posted February 11, 2015 Share Posted February 11, 2015 You've done a nice job with the shape of the front end there - that's probably the most difficult and most distinctive part of the old 201s. Alan Quote Link to comment Share on other sites More sharing options...
RobertRoche Posted March 16, 2015 Author Share Posted March 16, 2015 Firstly thanks for all the nice comments! I bought five Hornby Mark 4 coaches painted into Intercity livery a few months ago from Ebay. While the BR mark 4's are not the same as Irish Rail's, they do a good job. A few extra windows on each carriage, and several on the buffet car. I may do something about those in the future, but the main problem was the tension lock couplings which are moulded into the bogie. I purchased some Bachmann 36-026 couplings and replaced the tension lock so I can run these with a MM 201. I chopped off the tension lock and removed about 5 mm of plastic where the tension lock attached to the bogie. After replacing the valence, I slotted in a piece of plasticard, and glued the new coupler to that. The result is pretty level with the height of the 201 coupler. I only replaced two couplers, but it would be easy enough to do all carriages. Someday I will build a DVT for the other end of the train. As for the C Class which is currently under construction, progress is slow, but I think it will be worth it. I am currently working on a Scalextrics layout which needs to be ready in two weeks. 1 Quote Link to comment Share on other sites More sharing options...
Sulzer201 Posted March 16, 2015 Share Posted March 16, 2015 Great work Rob and I love the way that B201 is coming on, a great reincarnation from a 33. Quote Link to comment Share on other sites More sharing options...
burnthebox Posted March 16, 2015 Share Posted March 16, 2015 Ata boy Rob, you keep that C Class on that workbench, I'm watching you Quote Link to comment Share on other sites More sharing options...
Mayner Posted March 17, 2015 Share Posted March 17, 2015 Great bit of work on the Metrovick seem to be turning a sow's ear into a silk purse Quote Link to comment Share on other sites More sharing options...
David Holman Posted March 17, 2015 Share Posted March 17, 2015 Very interesting to see what you are doing with that old 33, Rob. Has got me thinking because this sow's ear also exists in 7mm scale. Same issues re pancake motor, 'orrible wheels, chassis etc, but can be got hold off fairly cheap on the second hand stalls. The thing is - is it worth a punt in the larger scale? I'd be reasonably confident in a major fettling job, but would a scratchbuild be ultimately a simpler option? What is it about early diesels that attracts...? Comments welcome folks! Quote Link to comment Share on other sites More sharing options...
RobertRoche Posted June 27, 2015 Author Share Posted June 27, 2015 Thanks for all the comments everyone. This C class is coming along very slowly, but only a few more small jobs left before I think about painting. The biggest job left to do is sort out the roof tanks - I tried this before but failed miserably. I am thinking of trying a 3D print and seeing how it turns out. Other jobs include detailing, affixing some more brass grills and possibly shortening the body by a further few millimeters - if it is worth the effort. I have done a lot of small jobs on it such as fitting the marker lights and headlights. The buffer beams were straightened and just today I attached some nice whitemetal buffers. I am also working on a method of attaching the loco body to the chassis as it rises up at both ends. In other modelling, I am working on a 2x1 foot diorama of the shed at Connolly Station. The shed itself is made of scrap MDF covered in brick paper. I used plaster to create the hardstanding in front of the shed. The track used is a mix of Hornby, Atlas and some homemade pieces I picked up. There is plenty of work left to do over the summer but it is starting to take shape. All of the track is wired for DCC, allowing lights and sound equipped locos to operate for exhibition purposes. Quote Link to comment Share on other sites More sharing options...
Dunluce Castle Posted June 27, 2015 Share Posted June 27, 2015 That shed looks awesome, nice job! Quote Link to comment Share on other sites More sharing options...
RobertRoche Posted January 1, 2016 Author Share Posted January 1, 2016 (edited) Happy new year to you all. Not much happened during the second half of 2015, hopefully I will get the ball rolling again for 2016 Since my last update I have not touched the C Class, still stuck on the roof boxes, which I may attempt again soon. I completed my diorama of Connolly Shed for the Wexford Model Railway Club October exhibition. Since my workspace was in such a mess over the year I cleaned it up and installed a shelf and some lighting - mostly for the fun of it but it is useful. I worked on painting up some 45 foot containers in some description of fantastical Bell container livery. I've also been building the Airfix 1:72 Severn Class lifeboat - which will eventually end up on my layout. It has given me a good introduction to spraying enamels and being patient about it! Hopefully I'll get a bit more time this year to complete my current list and start on some new ones. Edited January 1, 2016 by robbie58 Quote Link to comment Share on other sites More sharing options...
Riversuir226 Posted January 1, 2016 Share Posted January 1, 2016 Nice work, going to keep an eye on the c class conversion, the rnli lifeboat is coming along nicely . Quote Link to comment Share on other sites More sharing options...
jhb171achill Posted January 2, 2016 Share Posted January 2, 2016 Excellent work on the "C" class. It looks so easy, yet I'm sure it's like converting a Mk 4 driving trailer into a Donegal 2.6.4 tank engine..... I'm presuming the lifeboat will shortly enter service on the Limerick - Galway line? Quote Link to comment Share on other sites More sharing options...
craven1508 Posted January 2, 2016 Share Posted January 2, 2016 serious flooding will keep alot of our network closed for a while yet!! lovely work done there!! take a bow my son!! Quote Link to comment Share on other sites More sharing options...
scahalane Posted January 2, 2016 Share Posted January 2, 2016 Excellent work,look forward to seeing this diorama at the Wexford show. Quote Link to comment Share on other sites More sharing options...
DiveController Posted January 2, 2016 Share Posted January 2, 2016 Lovely diorama! Looking forward to the final C class at some point:tumbsup: Quote Link to comment Share on other sites More sharing options...
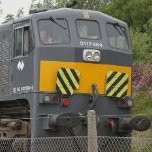
RobertRoche Posted January 2, 2016 Author Share Posted January 2, 2016 Thanks for all the comments, they are much appreciated. Luckily I'm not too bad for flooding so no rush on the lifeboat I have completed some simple 3D models for C class roof boxes. My first time really doing 3D anything, though the plan in work this year is to start using 3D modelling for civil projects. I am getting an initial test print done this week, and if I need to tweak the design - roof curvature, height, length etc I can do so. The longest part is 40 mm. I have found many pictures of the C class, but only a few that show decent roof detail. I have been looking at the details on the Silverfox models for inspiration. Not sure what to expect really, here is the model: Quote Link to comment Share on other sites More sharing options...
Riversuir226 Posted January 2, 2016 Share Posted January 2, 2016 would this help? Quote Link to comment Share on other sites More sharing options...
RobertRoche Posted January 4, 2016 Author Share Posted January 4, 2016 [ATTACH=CONFIG]22035[/ATTACH]would this help? Thanks Tom, it's a great photo in its own right. I got the prints back today, initially they look a bit on the small side, though the overall effect is there. Because of the shape of the roof they were printed in an orientation that resulted in ridges along the top surface. I'll have a go at sanding these out, or perhaps printing differently next time. I don't even have blue tack to test fit so I just plonked them on the model to take a picture. Because of the size, heat retention was also an issue while printing. A bit more work required then. I'll probably introduce some plasticard for some of the other details. I also can't decide if I need to shorten the body again, the model is a bit on the large side. Quote Link to comment Share on other sites More sharing options...
wexfordloco10 Posted January 5, 2016 Share Posted January 5, 2016 Well done looking forward to seeing them at the club You will be going to 0 gauge next Quote Link to comment Share on other sites More sharing options...
RobertRoche Posted September 24, 2016 Author Share Posted September 24, 2016 I have done some work on the C Class at last. I have added roof detail, grills and shortened the whole thing by about 1 cm. I added windows in the sides and put some small details on the chassis. Further sanding is required before I add details to the buffer beam, though I managed to misplace my lamp irons! I may put a cab in one end, though it will be difficult to spot. In this state it is almost as if it is going for an overhaul after being outside for many years. The white details on the roof are 3D printed while the black details are scratchbuilt. Quote Link to comment Share on other sites More sharing options...
Noel Posted September 24, 2016 Share Posted September 24, 2016 What a superb conversion of a lima class 33. Coming on really well. Really looks like a C class. Quote Link to comment Share on other sites More sharing options...
GSR 800 Posted September 24, 2016 Share Posted September 24, 2016 That looks Epic! a proper job, well done. Quote Link to comment Share on other sites More sharing options...
RobertRoche Posted September 25, 2016 Author Share Posted September 25, 2016 Thanks for the positive comments, hopefully it turns out well now! As a size comparison here it is beside a 141. Quote Link to comment Share on other sites More sharing options...
RobertRoche Posted May 13, 2017 Author Share Posted May 13, 2017 I picked up 10 double beet wagons from Leslie at Bangor. I really enjoyed putting them together and hope to do more in the future. They are sprayed with Halfords red primer, I am unsure whether I should spray them brown now or just apply lots of weathering. 2 Quote Link to comment Share on other sites More sharing options...
popeye Posted May 13, 2017 Share Posted May 13, 2017 They look nice but will need a lot of weathering, good luck. Quote Link to comment Share on other sites More sharing options...
Kirley Posted May 13, 2017 Share Posted May 13, 2017 They are sprayed with Halfords red primer, I am unsure whether I should spray them brown now or just apply lots of weathering.[ATTACH=CONFIG]27909[/ATTACH] If your image is a true reflection of the colour of your models I am surprised they turned out so red. I always shake the can for 2 minutes (I know it's a long time) to ensure the primer is properly mixed before spraying, this is the colour I got from the same primer. A coat of red oxide or a brown might be the way ahead. 1 Quote Link to comment Share on other sites More sharing options...
Noel Posted May 13, 2017 Share Posted May 13, 2017 If your image is a true reflection of the colour of your models I am surprised they turned out so red. I always shake the can for 2 minutes (I know it's a long time) to ensure the primer is properly mixed before spraying, this is the colour I got from the same primer. [ATTACH=CONFIG]27915[/ATTACH] A coat of red oxide or a brown might be the way ahead. Just a technicality, but as your photo above is backlit in natural daylight it's impossible to compare the colour from the two exposures. 1 Quote Link to comment Share on other sites More sharing options...
RobertRoche Posted May 13, 2017 Author Share Posted May 13, 2017 Thanks for the comments, the colour in my picture looks correct on my screen, so yes they are quite red. A coat of red oxide or a brown might be the way ahead. I think that this is what I will be doing, a coat of flat brown might do it. They look nice but will need a lot of weathering, good luck. Thanks, plenty of weathering to do on them! Also need to sort loads. 1 Quote Link to comment Share on other sites More sharing options...
JasonB Posted May 14, 2017 Share Posted May 14, 2017 As said already its nothing a light coating of brown can't sort out.Nice work by the way they look very well. 1 Quote Link to comment Share on other sites More sharing options...
Recommended Posts
Join the conversation
You can post now and register later. If you have an account, sign in now to post with your account.